Database August 15, 2024
This plugin provides a simple (relational) database implemented through the Resource ( its documentation ) system of Godot. Moreover, a dedicated editor is provided to create and edit such databases.
Now, why use Resource as the base for the database, instead of json or any other? Well, initially I did consider those options, including SQLite .
There are several formats that are text based, such as json and XML. Those are very "friendly" to version control systems. Yet binary formats tend to offer better loading performance. Then SQLite on the other hand is entirely binary format, making it not very friendly to version control. Moreover, this is probably completely overkill to hold and provide game data.
Godot offers something interesting, however. When we save a resource using its default extension (.tres), then the data is saved in text format. Nice for version control. Yet, there is a feature that converts text resources into binary data when the project is exported. This feature effectively brings us the convenience of being able to deal with version control during development while also taking full advantage of the faster loading times provided by binary storage.
In Godot 3.x this feature used to be off by default. But now in Godot 4.x it's on. To be more specific, it can be found in Project Settings -> Editor -> Export -> Convert Text Resource to Binary.
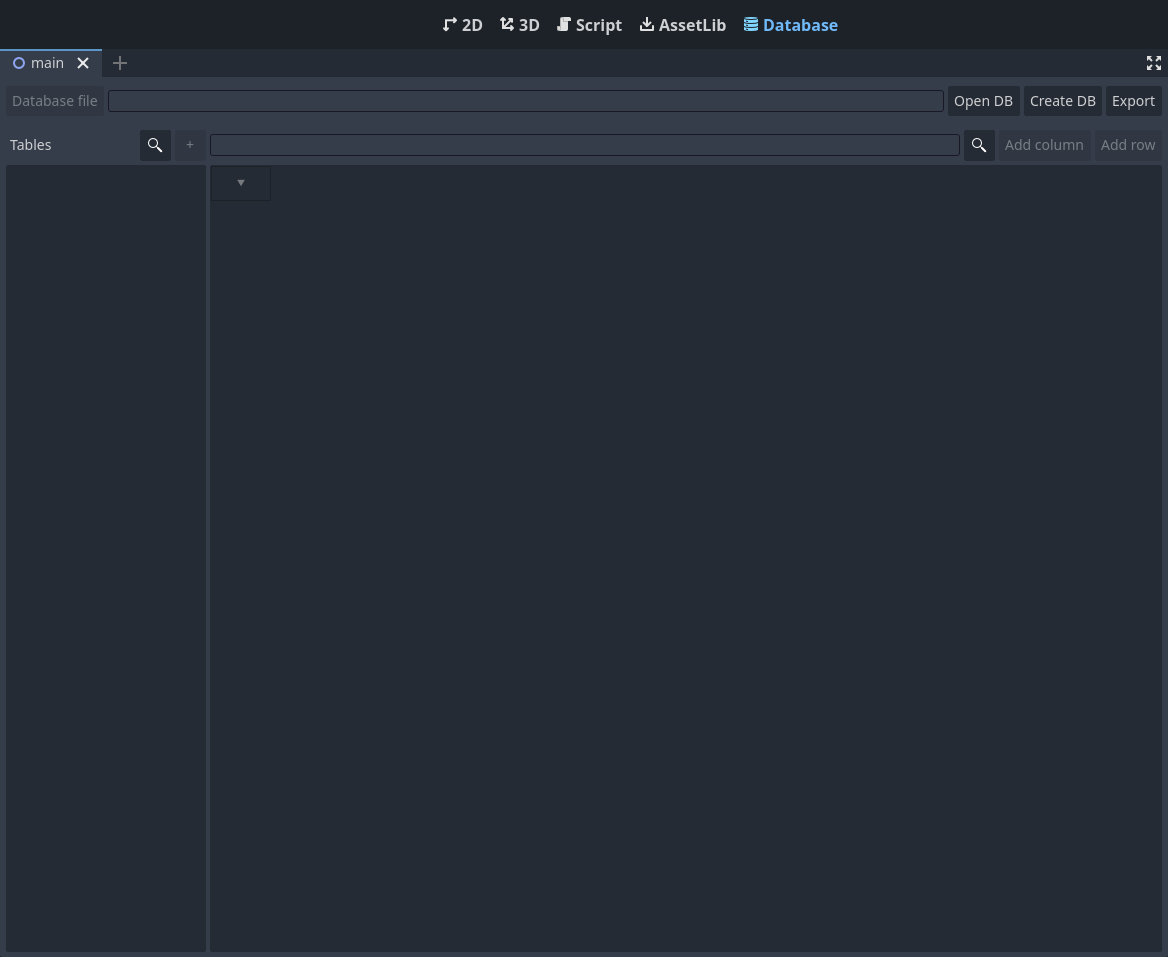
All that said, the screenshot bellow show the editor without a loaded database:
Usage
To begin editing data we obviously need a database resource. There are two obvious option to create one:
- In the editor, within the File System dock, right click the directory to hold the file then
Create New -> Resource. In the window choose GDDatabase as type then Create. At this point you will need to specify the name of the new file then click Save. - Clicking the Create DB button within the Database editor pane. It will bring a generic file dialog that allows us to choose the directory that will hold the new resource as well as the name of the new file.
Note the extension of the file, tres or res. The first one will result in the resource storing the data in text format, while the second will force Godot to store data in binary format. As I have mentioned in the introduction, part of the reason I chose to work with Resource for the database implementation is related to this "text vs binary" format.
Anyway, once the new database is created, if you chose option (1) to create the resource, you will need to load the file by either double clicking it or using the Open DB button in the Database editor pane. If you go with option (2) then the new file will automatically be loaded in the editor.
Once a valid database resource is loaded, the "+" button above the table list will be enabled, allowing us to create new tables associated with the loaded database:
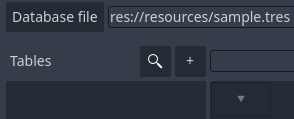
Clicking this button brings a dialog that allows setup of the new table:
The first field of this dialog is the table name, which should be pretty self explanatory. The name of the table can be changed after its creation and I will show how shortly.
Next is the File Name. This should be self explanatory as well, but note that checkbox after the field, the Embed. If this is enabled then thew new table data will be directly stored within the database resource itself. Otherwise a new resource file exclusively for the able will be placed alongside the database. Note that currently there are only two ways to create binary data tables:
- Embed into binary databases.
- Manually create a
DBTableresource by right clicking the File System dock thenCreate New -> Resource. In this case the file name must have res as extension instead of tres.
The ID type can be chosen between Integer or String. While this is entirely up to you, just know that it cannot be changed after the table is created. If the Editable checkbox is disabled then the ID value will become a read only field within the table editor.
For the next screenshot I have created two tables, one embedded and the other in a separate file, mostly to show how the UI displays the information. Note that the first table (another) contains its file name written bellow the table name. HOvering the mouse above the file name will bring a tooltip wit the ful path to the resource. The second table (something) is embedded and this information is shown bellow its name with the <Embedded> string:
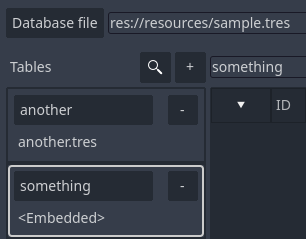
In this image the something table is selected and this fact is shown by the highlight border around the table information. Each table's box contains two buttons. The first button's text matches the name of the table. The second contains a '-'.
Clicking the "name button" brings a dialog that allows us to edit the name of the table. In it the "OK" button will be disable if the new name is empty, corresponds to an existing table in the opened database or is equal to "id" (case insensitive). This is the dialog when attempting to set an already existing name:
As for the "-" button, it is used to request the editor to remove the table from the database. A confirmation dialog will be shown. Please note that if the table is stored in its own file then it will not be deleted, just not handled by the database resource. However, if it's embedded then the data will be completely removed and there is no way to revert it (at least not without an external data recovery tool).
Right above the table display itself there are a few buttons. More specifically for this case are "magnifier glass", add column and add row. Shortly I will talk about the "magnifier". On a fresh new table the Add Row button will be disabled because there are no columns. Wait, how about that "ID" column? Well, indeed, it's shown as a column but it's not a "real one". The "ID" is used as an alternative to row index that allows us to reach/query the desired data within the table. Here are the buttons:

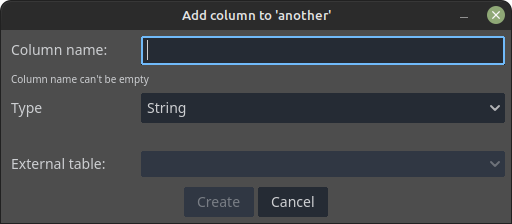
Now, clicking the Add Column button brings a dialog that allows us to setup its initial state:
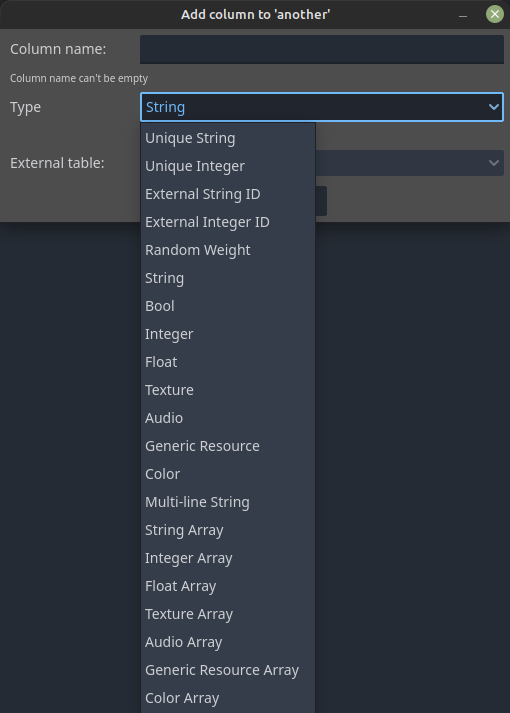
The Column name field should be pretty self explanatory, right? The type field allows selecting the value type of the column. It is a drop down menu offering the following options:
As you can see, there are several value type options to be chosen from. Some of these types cannot be changed after the column is created. This fact will be shown on the dialog in case such option is selected. That said, there are a few things that are worth mentioning about some of those types (I will skip the self explanatory ones). Expand the contents for the explanation:
Unique String,Unique Integer- Columns of this type behave slightly different. Basically repeated values wont be allowed within that column. To that end, adding a new row will result in the internal system creating a default unique value for the new cell. Moreover, strings cannot be empty. There is no visual difference between cells of unique values and the "ordinary" ones.
- Because columns of these types require a bit of internal upkeep to ensure uniqueness, there is a slight extra overhead compared to other columns. It shouldn't be a problem on most cases, however it's worth mentioning this fact.
External String ID,External Integer ID- This value type allows cells to "point" into values of a different table of the same database. If you already know about relational databases, this works similarly to foreign keys. When one of these two types get selected, the External Table drop down will be enabled, allowing the selection of another table that contains ID types matching the one selected.
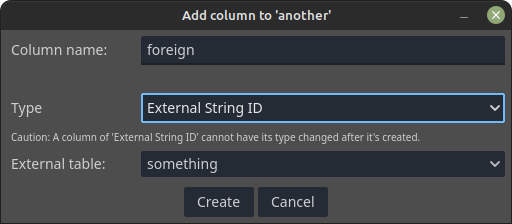
- Note that two tables cannot reference each other like this. Another thing is that it's not possible to add multiple columns in a table pointing to the same other table.
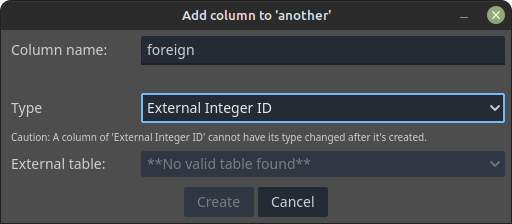
- The image bellow showcases how the dialog will become in case there is no other table to be referenced. Indeed, in the example both tables that I have created are of string ID types:
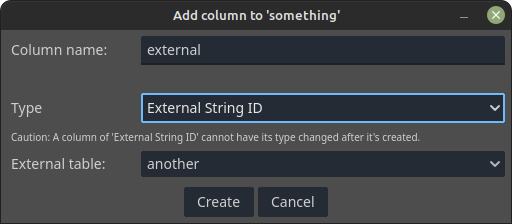
- The image bellow showcases how the dialog will become in case there is at least one other table to be referenced:
Random Weight- This is a special column that will hold floating point values, defaulting to 1.0. The main idea of this column is to automatically deal with probability weights so you can randomly pick any row from the table. The technique in here is described in the Weighted Random Selection With Godot . Only one column of this type can be added per table.
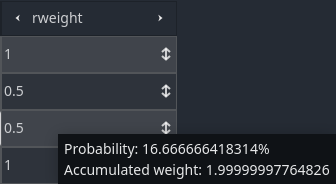
- Hovering the mouse cursor above cells in a column of this type also provide some additional information that can be very useful, like the actual probability of that row being selected as well as the accumulated weight. The screenshot bellow showcases the fact:
Texture,Audio- While the internal stored value of a cell of any of these columns is simply a string holding the path to the resource file, the cells allows us to "preview" valid resources. In the case of the texture a thumbnail will be shown, while the audio contains buttons to playback the assigned resource.
Generic Resource- Much like textures and audio, cells of this type hold strings holding the paths to any kind of resource supported by Godot. Just note that no preview will be shown in this case.
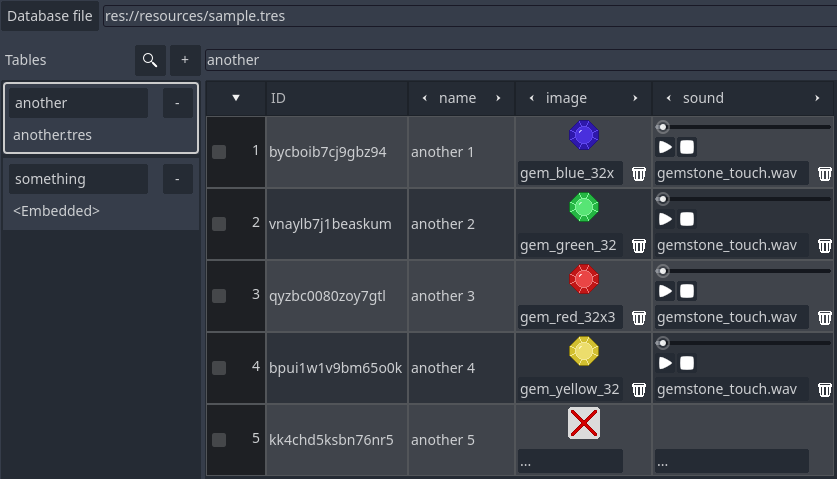
To continue with the example, I have added three columns into the another table. Those are of string, texture and audio types, respectively. After that a few rows just to be able to show some details. The image bellow showcases this. Things to note in there:
- In the texture column when no image is assigned there will be a default "cross image" to show the fact. There is a "..." button that if clicked will bring a filed dialog that allows us to select any image resource within the project. When a valid texture is selected the label of this button will be changed to display the name of the file. Moving the mouse over the button will bring a tooltip with the full resource path. As mentioned, the thumbnail displays the texture. And, there is a trash bin icon that if clicked will reset the value of the cell to "empty".
- Similar to the texture column, the audio contains the "..." button that allows us to select a valid audio resource as well as display the file name when one is assigned to the cell's value. When there is a resource, the playback buttons are shown and a "progress bar" appears above to show how much of the audio has been played. The trash bin button can be used to clear the value of that cell.
In the something table I have added two columns, one of external string id and the other for random weight. The add column dialog for the external id is shown bellow:
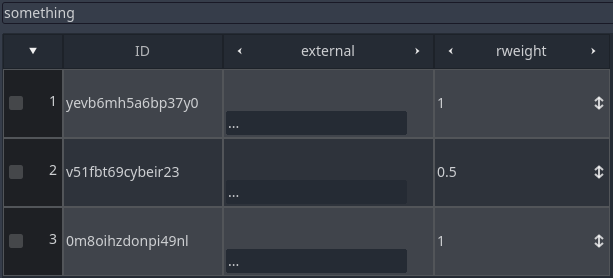
The idea here is to show how a column can point to values in a different table. After adding a few rows, I changed the weight value of the second row to 0.5 to exemplify some things that I want to explain about the Random Weight column shortly. That said, this is how the table looks like:
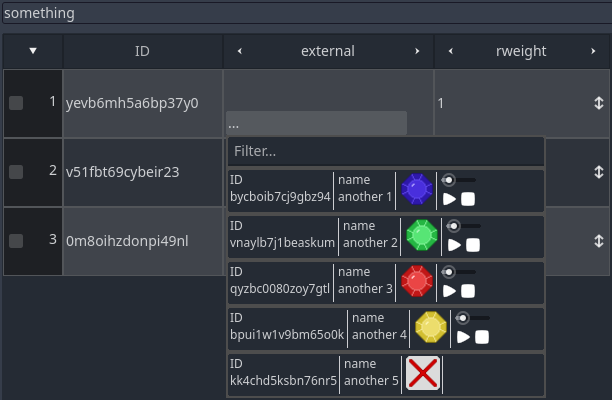
Note the external column. Each cell contains a "..." button. Clicking it will bring a dropdown menu with a preview of the row values of the referenced table. This dropdown also provides a filter input box, which should help find the desired row. The text will match ID or any other cell. This is how the dropdown looks like:
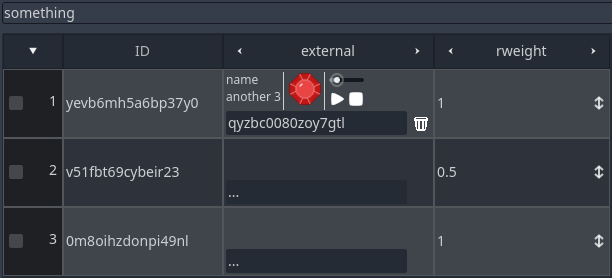
When an external row is selected, the label of the button will be changed to the ID of the selected one. The trash bin button will appear allowing us to clear the cell value. Above the button will appear a preview of each column/value pair corresponding to the selected row, like in the image bellow:
Now for the random weight column. If you did read the Weighted Random Selection With Godot tutorial, then you will know that the random weight is just a relative probability between the candidates. In the case of this table, rows 1 and 3 have equal change, while row 2 has half the chance of any of the other two rows. This is important to know when you start assigning the weights. As I have mentioned, cells of this type provide some useful information. If you hover the mouse above rows 1 and 3 then you will notice that both have the same probability (shown in the tooltip). And if you hover above row 2 then the tooltip will show that it has half of that probability.
Note that in this specific case there is rounding error caused by floating point math, resulting in the probabilities shown being different from 40/20/40, but something very very close to that.
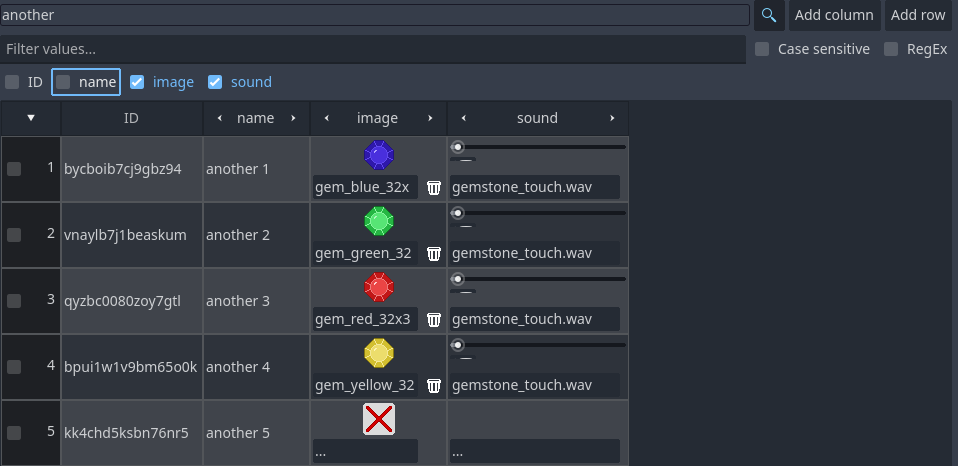
Notice the magnifier buttons. Toggling one of those will reveal/hide the input box allowing a "filter" text to be used. In the left panel it helps find the desired table. In the right panel it will help filter out rows in the selected table. One thing to note here is that specific columns can be removed or included in the search by simply toggling on/off the corresponding titles. In the image bellow the column "name" will not be considered when searching for the entered filter.
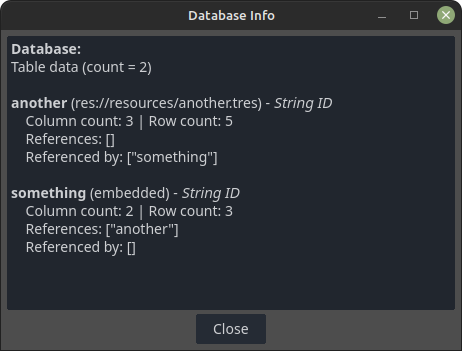
You may have noticed the Database File button becomes enabled as soon as a database resource is loaded. Clicking this button displays information related to the database itself, like how many tables are in it along with some more information about each of the tables. This is the window following the example up to this point:
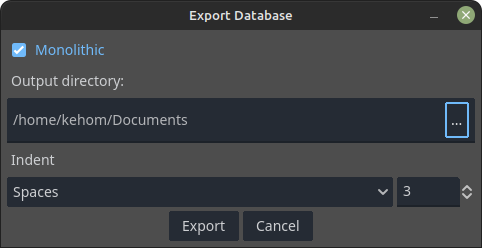
Databases can be exported to JSON. Clicking the Export button, which is at the top right corner of the database editor, brings the Export Database dialog. It provides a few settings that determine how the JSON will be formatted, as well as where the file(s) will be saved. The first thing in this dialog is a checkbox, Monolithic. If this is on then all the data will be stuffed into a single .json file, which will match that of the database resource itself. If this is off, however, each table will be placed in its own .json file, which will have filename matching that of the table itself. Files will always be saved alongside each other, in the specified directory. Indentation can be configured. The screenshot bellow shows the Export Database dialog:
The UI provides a relatively easy way to fill the database with data. How about retrieving it within the game logic? For that the database offers a few functions meant to obtain the required values. To access theses functions we obviously need to load the database:
var db: GDDatabase = load("res://resources/sample.tres")
There are two functions that can be used to retrieve rows:
get_row_from(table_name: StringName, id: Variant, expand: bool = false)get_row_from_by_index(table_name: StringName, index: int, expand: bool)
The only difference between the two functions is the second argument. In (1) we have to specify the row ID, while in (2) we specify the row index. Ideally we should retrieve rows by ID, as the index can potentially change, specially after sorting rows. That said, on both cases the name of the table from where the row should be taken is specified by the first argument table_name.
The last argument, expand, is only meaningful if the table table_name references another one. In that case, if this parameter is true then the IDs of the other table will be substituted by the values of the corresponding row.
That said, the return value is a Dictionary containing a key for each column in the table, holding the associated cell's value.
To select a random row and return it:
randomly_pick_row(table_name: StringName, expand: bool, random_number_generator: RandomNumberGenerator = null)
Again, the name of the table from where the row should be taken must be specified, with table_name. The expand parameter has the exact same functionality of the two previously mentioned functions. Lastly, the random_number_generator allows us to use an arbitrary random number generator. This brings more control over the seed and state of the generator itself. The returned dictionary is also the same of the two functions to retrieve rows.
Important to note is that if the table does not contain random weights, a random index will be chosen where, in theory, each row has the same probability to be chosen. Otherwise the weight system will be used.
Now notice that those functions are accessed through the database resource itself, which internally retrieves the table resource, which is a DBTable. Depending on how many times you need to obtain data from tables, performing those "queries" may negatively impact performance. IF that's the case then maybe it's better to first manually obtain the table with get_table() function then extract the necessary data from it.
Specifically from the DBTable returned by get_table(), there are three functions that somewhat match the mentioned ones to retrieve row data:
get_row(row_id: Variant)get_row_by_index(row_index: int)pick_random_row(random_number_generator: RandomNumberGenerator = null)
Note the fact that none of those functions offer the expand parameter. This occurs because the "wiring" is performed by the database resource.
