Godot Addon PackApril 17, 2020
Attention: This addon pack does not work in Godot 4. I'm currently working on converting the relevant addons into Godot 4 as GDExtension, however it might take some time because of several rough edges within the provided API.
Each page in this multi-part tutorial corresponds to one addon that can be found in my Godot Addon Pack.
The addons were designed to have minimal inter-dependency, so it becomes possible to install only those that are required for the project. Still, keep an eye on the addon's description because I do specify if there is any other internal dependency. The entire addon pack requires Godot v3.2.x to work.
Some addons can be directly used after installing them while others may require activation within the project settings window. This information will also be given with each addon.
The tutorial page for each addon will contain two major sections, one that showcases how to use the addon itself and the other how it was done so if needed you can change and adapt it for your needs. To avoid some pages from becoming to large (for scrolling), each section has been added into a tabbed navigation, like this:
The project repository is a demo containing examples for each of the addons. Within the How to Use tab of each tutorial sometimes there will be mentions to the examples (from the repository) in case you need to see in practice what has been explained.
The normal installation process for any Godot addon consists of copying the desired addon directory into a project's addons subdirectory. As an example, suppose you want to install the network addon into the project under mygame directory. The process here would be to just copy the network directory into the mygame/addons/network location.
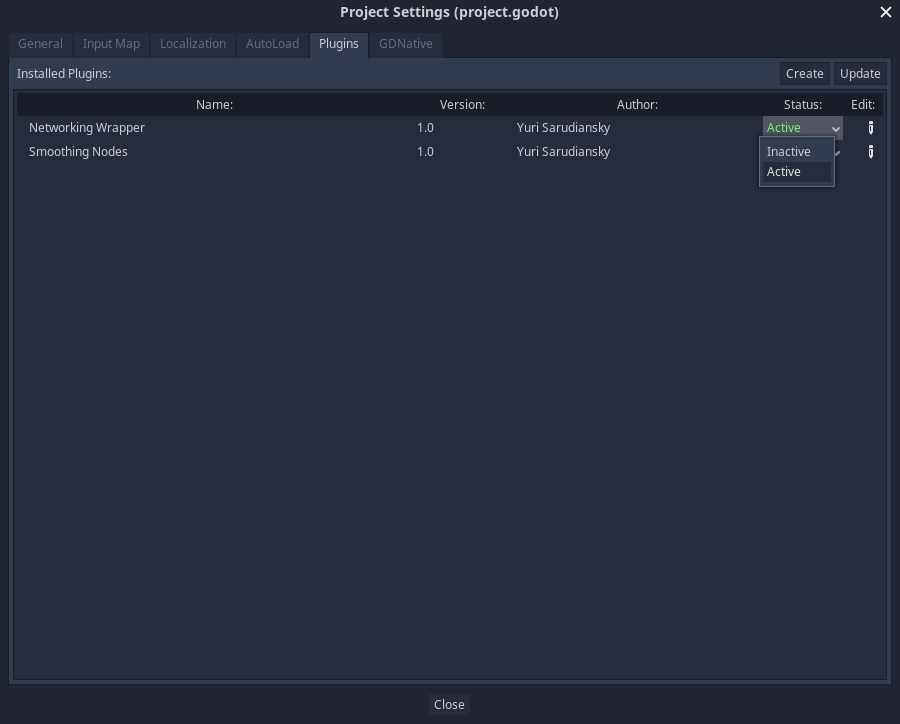
As said, some addons may require activation within the project settings window. This information is shown in the table bellow and in the specific case of the network addon, the activation is necessary. To reach the window, basically click the Project menu option then Project Settings.... Open the Plugins tab and there you should find the addons that have been installed and require activation, like in the following image:
Remember about the dependency when installing addons. Obviously, if one addon requires another, the dependency also must be installed to. Using the network addon as an example, it requires the general addon. The specific file will be mentioned so you still can install only the necessary files into your project.
The available addons are shown in the table bellow. Clicking on the addon name will take you into the corresponding tutorial.
| Addon | Dependency | Description | Activation |
|---|---|---|---|
| General | - | Contains a few general utilities, like variant encoding/decoding into byte arrays | no |
| Network | General (data/encdecbuffer.gd) | Automates most of the networked multiplayer synchronization process | yes |
| Nodes | - | Some Godot Scenes with attached scripts that are meant to be used by creating instances within other scenes | no |
| Smooth | - | Largely based on Lawnjelly's smoothing addon, automates interpolation calculation of child nodes | yes |
| UI | - | Custom user interface Control nodes | yes |
| DebugHelper | - | Some scripts to help with the debug process | yes* |
| Database | UI (TabularBox) | Provides a simple database implementation with an in editor plugin to create and edit the data | yes |
| DataAsset | UI (SpinSlider) | Resource meant to provide data assets, with an editor plugin to edit exposed properties, including support for custom scripted resource types | yes |
| AudioMaster | - | An auto-load script meant to manage audio playback | yes* |
| RadialImpulse | - | Provides means to apply impulses into all rigid bodies that are inside of an area | yes |
* The DebugHelper and AudioMaster addons uses activation to automatically add the scripts into the auto-load list. As an alternative you can manually add those scripts to that list instead of activating the corresponding plugins.
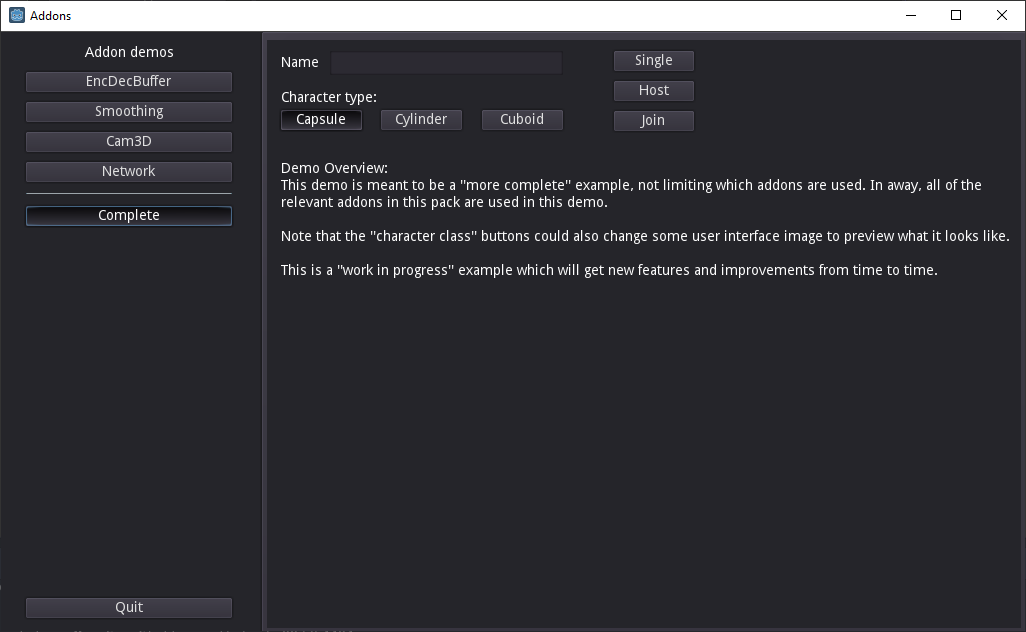
Besides the addons, the repository contains a demo project holding several examples of how to use the addons. Running it from Godot should take you to a window allowing to select an example (from the left side). This will change the right side to show some text describing the corresponding addon as well as the demo itself. There is also an extra demo named Complete, which is meant to combine all of the relevant addons in the pack into a somewhat larger example. The image bellow showcases the main menu with this extra demo selected:

