Part 6 - Block SpawningApril 11, 2019
Right at this point, we have means to visually display our different blocks and the grid. However, as seen in the last part, we have to scale the blocks so their size looks "correct" when compared to the grid cells. Besides that, we also want to dynamically spawn those blocks. In this part we will work on more foundation code that will be necessary to accomplish the task.
Theme Access
In the previous part we implemented the core of the theme system and now we need to access data stored in the selected theme, which is stored in the game instance. This means we have to obtain a pointer to an object of that class, cast to the correct type, UColGameInstance and finally use the function that will give us access to the desired theme object. Only then we can access the necessary data.
To make things somewhat simpler we can create a blueprint function library and in there provide functions to directly access (retrieve and set) the theme in the game instance. The interesting aspect of doing this is the fact that blueprint libraries are formed by C++ static functions and we can also access them from both blueprint and native code. Of course, throughout the project we will be able to add more functions into this library.
To create such a library all we have to do is create a class derived from UBlueprintFunctionLibrary and implement static functions. With that said, let's create a new file ColBPLibrary.h. In there we will begin with 3 functions, one to retrieve a pointer to the Game Instance, already casted to UColGameInstance, another to set the theme in the game instance and the last to obtain the theme from the game instance:
#pragma once

#include "Kismet/BlueprintFunctionLibrary.h"
#include "ColBPLibrary.generated.h"

UCLASS()
class UCOLUMNSTUTORIAL_API UColBPLibrary : public UBlueprintFunctionLibrary
{
   GENERATED_BODY()
public:
   // Retrieves the game instance, casted to UColGameInstance
   UFUNCTION(BlueprintPure, meta = (WorldContext = "WorldContextObject"))
   static class UColGameInstance* GetColGameInstance(const UObject* WorldContextObject);

   // Set the theme data inside the game instance
   UFUNCTION(BlueprintCallable, meta = (WorldContext = "WorldContextObject"))
   static void SetGameTheme(const UObject* WorldContextObject, class UThemeData* ThemeData);

   // Obtain current game theme data
   UFUNCTION(BlueprintPure, meta = (WorldContext = "WorldContextObject"))
   static class UThemeData* GetGameTheme(const UObject* WorldContextObject);
};
Don't worry too much about the WorldContextObject argument tha appears on all of those functions. In their implementation you will see that we will need that argument in order to obtain the necessary data. When using them in native code we will usually pass in the this pointer from the calling class (which mostly will be from the game mode). The blueprint node will not even contain that argument's input pin. Moving on, let's see the include list in the .cpp file:
#include "ColBPLibrary.h"
#include "Engine.h"
#include "ColGameInstance.h"
Let's implement those functions, one by one. In there we have to first obtain a pointer to the current UWorld object, which can be done through the use of UEngine::GetWorldFromContextObjectChecked() which requires one UObject* as parameter. In this case, we pass in the WorldContextObject. Then, we just use UWorld::GetGameInstance() to return the pointer. Conveniently, there is already a template function that will automatically cast to the desired class:
UColGameInstance* UColBPLibrary::GetColGameInstance(const UObject* WorldContextObject)
{
   if (UWorld* world = GEngine->GetWorldFromContextObjectChecked(WorldContextObject))
   {
      return world->GetGameInstance<UColGameInstance>();
   }

   return nullptr;
}
Next, we work on the SetGameTheme(). We need to obtain the game instance pointer and then call its SetTheme() function. The nice thing is that we can reuse the function we have just created:
void UColBPLibrary::SetGameTheme(const UObject* WorldContextObject, class UThemeData* ThemeData)
{
   if (UColGameInstance* gi = GetColGameInstance(WorldContextObject))
   {
      gi->SetTheme(ThemeData);
   }
}
Finally, we implement GetGameTheme(). Again, we have to obtain the game instance pointer and then use its GetTheme():
class UThemeData* UColBPLibrary::GetGameTheme(const UObject* WorldContextObject)
{
   if (UColGameInstance* gi = GetColGameInstance(WorldContextObject))
   {
      return gi->GetTheme();
   }
   return nullptr;
}
Shortly we will use those functions. First we have to deal with some more theory.
Randomness
For the most part, the actual block to be spawned must be random. This means that we have to implement a "random block picker". We have a "list" of blocks, each one with a probability weight and we want to randomly pick one from this list. There are numerous ways of doing this kind of task. If you are interested in some reading regarding this, there is the Keith Schwarz' Darts, Dice and Coins: Sampling from a Discrete Distribution as well as the Red Blob Games' Probability and Games: Damage Rolls excellent articles. Nevertheless, the overall ideal of the algorithm that we will use follows:
- Iterate through all entries in the list, accumulating (summing) the probability weights. Let's call this weight_sum. Assign "current weight_sum" to the entry being iterated. Let's call this accumulated.
- Generate a random number between 0 and weight_sum. Let's call it roll.
- Search in the list for the first entry where its accumulated is greater than or equal to roll.
The great thing about this method is that it scales very well with bigger collections! Now, to illustrate this algorithm, suppose 6 items A, B, C, D, E and F (I know, those are not creative names but...), with weights 1, 1, 1, 0.5, 0.5 and 0.5, respectively. The accumulated value assigned to each element will be, 1, 2, 3, 3.5, 4 and 4.5, respectively. The final weight_sum will be 4.5. The table bellow summarizes all of this:
| Item | A | B | C | D | E | F |
|---|---|---|---|---|---|---|
| Weight | 1 | 1 | 1 | 0.5 | 0.5 | 0.5 |
| Accumulated | 1 | 2 | 3 | 3.5 | 4 | 4.5 |
To obtain roll we would then use the random number generator to return a number between 0 and 4.5. If roll = 3.1, then we would pick D since its accumulated weight, 3.5 is the first one that is bigger than roll.
With this technique, if you want to know an item's individual probability, all you have to do is divide its weight by the total weight_sum.
Step 3 of the overall algorithm involves a search for the accumulated value. In our case we have very few items, meaning that a linear search is not a problem. However, if we had a big list, a different method would be required. A binary search being the most straightforward, since we already get an ordered list of accumulated values.
As you can see, we need to know the contents of the block list inside the theme. Our game mode has just received code to give us access to the theme data. Since we want to control the game rules from the game mode itself (as it's the ideal class for that), we will add the "random picker" to the game mode. However, not the base. If we do that, the mode used in the MainMenu will get unnecessary extra functionality. Instead we will add this picker to the GameModeInGame class. This function should return an index to the entry in the block list array.
Rather than calculating the total weight_sum every time we need to pick a random block, we will store this value in a property, which will be initialized through the use of a function, called in the OnConstruction() override function. With that said, we declare, in the public section, our functions including the construction override:
virtual void OnConstruction(const FTransform& Transform) override;

UFUNCTION(BlueprintCallable)
void CalculateWeightSum();

UFUNCTION(BlueprintPure)
int32 PickRandomBlock() const;
And we declare the private property that will hold the weight_sum:
UPROPERTY()
float mWeightSum;
Now, in the .cpp file we have to update the include list:
#include "GameModeInGame.h"
#include "ConstructorHelpers.h"
#include "ColPlayerController.h"
#include "ColGameInstance.h"
#include "ThemeData.h"
#include "ColBPLibrary.h"
Let's begin implementing the CalculateWeightSum(). In it, the first thing we do is assign 0 to the stored weight sum, just to make sure it begins at the right state. Then we obtain the theme data pointer and, if valid, iterate through each entry in the block collection array, accumulating the probability weight:
void AGameModeInGame::CalculateWeightSum()
{
   // Make sure it begins with a "clean" value
   mWeightSum = 0.0f;
   if (UThemeData* theme = UColBPLibrary::GetGameTheme(this))
   {
      for (const FBlockData& bdata : theme->BlockCollection)
      {
         mWeightSum += bdata.ProbabilityWeight;
      }
   }
}
In the OnConstruction() we call CalculateWeightSum():
void AGameModeInGame::OnConstruction(const FTransform& Transform)
{
   Super::OnConstruction(Transform);

   // Initialize the weight sum
   CalculateWeightSum();
}
Now, for the rest of the random block picker algorithm. Unreal Engine provides a function that returns a pseudo-random number in the specified range, named FRandRange(). We also have the actual range, which goes from 0 to mWeightSum. And we have access to the theme data, from which we can search for the blocks. As already mentioned, in our case we will perform a simple linear search, meaning iterating through each entry in the block array:
int32 AGameModeInGame::PickRandomBlock() const
{
   if (UThemeData* theme = UColBPLibrary::GetGameTheme(this))
   {
      const float roll = FMath::FRandRange(0.0f, mWeightSum);
      float accumulated = 0.0f;

      for (int32 i = 0; i < theme->BlockCollection.Num(); i++)
      {
         accumulated += theme->BlockCollection[i].ProbabilityWeight;
         if (roll <= accumulated)
            return i;
      }
   }
   return -1;
}
A quick study of this algorithm implementation shows that we are calculating the weight sum, partially or completely, multiple times. Since we have very few entries in the block array, this is not really too problematic. Still, if you really want to avoid this, you could add a new field to the FBlockData struct (declared in the ThemeData.h file) named Accumulated and then, in the CalculateWeightSum() function, right after updating mWeightSum assign the new property value to Accumulated. Note that if you decide to work on a different search algorithm rather than the linear search you will probably need this new variable, although in this tutorial I'm not going to perform this kind of change.
Block Management
Following our game rules, the blocks forming a matching sequence have to be removed from the play field. This means we have to keep track of spawned blocks and where they are. Doing this will then allow us to actually check if the blocks are in sequences. We will do this by using an struct, FGridCellData, meant to hold the necessary data and then use an array of objects of this struct. With some relatively simple math we then map row/column into the array index.
This struct will be small (in code) and won't require any definitions in a .cpp file. Although we could create a new file dedicated for this struct, we will actually create a helpers.h file and if we end up needing more simple structs like this one, they will also be added into this file. Spoiler alert, we will need more simple structs like this. Right at the top of this file, we add the usual:
#pragma once

#include "CoreMinimal.h"
#include "helpers.generated.h"
Besides a pointer to the block actor, we will add into the struct another two properties meant to hold coordinate values that will directly correspond to the cell in the paper tile map used to draw the grid in the APlayField class. Holding those two values will greatly help us get the correct spawn location. The struct then can be declared like this:
USTRUCT()
struct FGridCellData
{
   GENERATED_USTRUCT_BODY()
public:
   explicit FGridCellData(int32 MapCol = 0, int32 MapRow = 0)
      : TileMapColumn(MapCol)
      , TileMapRow(MapRow)
      , BlockActor(nullptr)
   {}

   UPROPERTY()
   int32 TileMapColumn;

   UPROPERTY()
   int32 TileMapRow;

   UPROPERTY()
   class ABlock* BlockActor;
};
Now we have the necessary tools to manage spawned blocks. Next we have to update our GameModeInGame class to make use of this management code. Before we do that, I have to mention a different approach, which is adding this management code inside the PlayField class instead of the GameMode. This has to be mentioned because for some people this may be more natural to think since the visual representation of the grid is already there. Doing so would require shifting most, if not all, of the game rules code into the PlayField. However, for some other people it's more logical to keep the game rules inside the Game Mode. Unfortunately I can't make both codes in a single tutorial and have to choose one of the approaches. In this case, I have chosen to keep the game rules within GameMode.
No matter which approach is taken, we will have one TArray property of FGridCelLData and this array will have to be initialized. In order to do that we need access to the grid's number of rows and number of columns. Currently those two values are stored in our PlayField class. Perhaps the grid size could be used as setting values from the Game Instance and then any other class needing this information could query from the Game Instance object! But what if we decide to have different grid sizes on different game modes? In this case, the grid size becomes part of the game rules and maybe would be better to be added into the Game Mode. This is precisely what we will do.
Whenever it's time to spawn a new block, its location (coordinates) is necessary and we have this information inside the Paper Tile Map, which is held by PlayField. This means that we need to access the PlayField from our GameMode. And then, in the PlayField we will need the correct grid size, which we will shift into the GameMode shortly. This is an example of circular dependency. The easier approach would probably "ignore" this circular dependency, however we can avoid it. Instead of making the classes depend on each other, we make only one of the classes use the other and at an specific time (initialization) setting up the necessary values. Because the GameMode will hold management code and we will eventually create a Blueprint class meant for value tweaking, it becomes the perfect choice to hold the setting values and then from it access and setup the PlayField class.
We defined that our GameMode will access the PlayField class but not the opposite. However, how we will access the PlayField will require some work. Let's analyze some of our options:
- In the
BeginPlay()of the game mode we spawn the PlayField which will make sure we hold the correct object's pointer. The problem here is that we loose the ability to preview in the editor any value change. In other words, we would have to click Play in order to see the results of those changes. - In the
BeginPlay()we query all actors of class (with Object Iterator) and setup the variables. We will be able to preview the positioning of the PlayField, but won't be able to see the correct grid size since the setup will only be performed during theBeginPlay(). - Use ObjectIterator in the
OnConstruction()function in the GameMode class in order to update the PlayField classes. With this, we can see the changes in the level editor without having to click the Play button. This is the chosen approach.
Ideally we would spawn the PlayField from the OnConstruction() function in the GameMode, however I have had some troubles making the grid to actually appear while in the level editor.
In any case, we can't directly change properties of C++ classes from the editor, so we will have to create Blueprint classes in order to be able to tweak values. At a later moment in this part we will do that. Right now we start updating our PlayField class, so we can setup the grid size. In the public section we add a function that will allow us to update the column count and row count properties:
void SetGridSize(int32 ColumnCount, int32 RowCount);
Then we have to change the actual properties. The way they are currently declared make them "publicly" editable. We don't want to allow that for those properties, since we will setup them from the GameMode class. The declaration of the properties should become like this:
UPROPERTY()
int32 mRowCount;

UPROPERTY()
int32 mColumnCount;
Because we are not removing those properties, only changing how they are setup, there aren't any other changes we have to do elsewhere in the code. All that is left for the PlayField update now is define the function, SetGridSize() we declared. What this function has to do is update (assign) the specified column count and row count arguments into the internal properties and then rebuild the grid and tile map:
void APlayField::SetGridSize(int32 ColumnCount, int32 RowCount)
{
   mColumnCount = ColumnCount;
   mRowCount = RowCount;

   BuildGrid();
   SetGridSprites();
}
We can now update the AGameModeInGame class, starting from the column count and row count properties. In the private section of the class we declare them:
UPROPERTY(EditAnywhere, BlueprintReadOnly, Category = "Grid Settings", meta = (DisplayName = "Column Count", AllowPrivateAccess = true))
int32 mGridColumnCount;

UPROPERTY(EditAnywhere, BlueprintReadOnly, Category = "Grid Settings", meta = (DisplayName = "Row Count", AllowPrivateAccess = true))
int32 mGridRowCount;
In the public section, we provide means to query column count and row count properties:
UFUNCTION(BlueprintPure)
int32 GetColumnCount() const { return mGridColumnCount; }

UFUNCTION(BlueprintPure)
int32 GetRowCount() const { return mGridRowCount; }
Now it's time to declare our block management array, in the private section of the class:
TArray<FGridCellData> mGridData;
Of course, in order for that to work we have to add helpers.h to the include list:
#include "uColumnsTutorialGameModeBase.h"
#include "helpers.h"
#include "GameModeInGame.generated.h"
Notice the fact that helpers.h was not appended into the list, it was inserted in the middle of it. The reason for that is the fact that .generated.h must always be the last include in the list. Speaking of include list, we have to update that in the definition file:
#include "GameModeInGame.h"
#include "ConstructorHelpers.h"
#include "ColPlayerController.h"
#include "ColGameInstance.h"
#include "ThemeData.h"
#include "ColBPLibrary.h"
#include "Engine.h"
#include "PlayField.h"
#include "Block.h"
#include "PaperSpriteComponent.h"
We now have to initialize the setting properties with the default values. In the constructor definition (of AGameModeInGame), append this:
AGameModeInGame::AGameModeInGame()
{
   ... // Previous code

   mGridColumnCount = 9;
   mGridRowCount = 16;
}
We have to add code to our OnConstruction() override. In there, we have to obtain the objects of APlayField placed in the scene. We can do that by using iterators and Unreal Engine provides 2 types of them, Object and Actor Iterators. Locate the section Object/Actor Iterators in the Documentation page if you want to read more about them.
In any case, Object iterator allows us to gather all objects of the specified class even before "Playing". This is precisely what we want in order to update the PlayField class. Just keep in mind the following warning taken from the documentation:
Using object iterators in PIE (Play In Editor) can lead to unexpected results. Since the editor is loaded, the object iterator will return all UObjects created for your game world instance, in addition to those that are just being used by the editor.
Actor iterators, however, don't give access to the actors until we are actually playing. This means that we can't use this kind of iterator for the setup. So, append this to the OnConstruction():
void AGameModeInGame::OnConstruction(const FTransform& Transform)
{
   ... // Previous code

   // Build the grid
   for (TObjectIterator<APlayField> it; it; ++it)
   {
      APlayField* pf = *it;
      it->SetGridSize(mGridColumnCount, mGridRowCount);
   }
}
The PlayField placed in the scene is now being setup. It's time to initialize the block management structure we have created. In order to do that, we first resize mGridData array to have exactly mGridColumnCount * mGridRowCount entries. In each entry we have to setup the correct tile map index. In here, we have to consider that index 0 of mGridData corresponds to the bottom left cell of the grid tile map. Increasing the index will first move to the "next column" before jumping to the "next row". In other words, our row indexing is the reverse of the grid tile map row indexing. Since we will store inside each mGridData entry the correct tile map index, we have to worry about this only here, during initialization of the array. With that said, we can append the mentioned code onto the OnConstruction() function of our AGameModeInGame class:
void AGameModeInGame::OnConstruction(const FTransform& Transform)
{
   ... // Previous code

   // Initialize block management array
   const int32 cell_count = mGridColumnCount * mGridRowCount;
   mGridData.Empty(cell_count);
   mGridData.AddDefaulted(mGridData.Max());

   int32 row = mGridRowCount - 1;
   int32 col = 0;
   for (int32 data_index = 0; data_index < cell_count; data_index++)
   {
      mGridData[data_index] = FGridCellData(col, row);

      if (++col == mGridColumnCount)
      {
         col = 0;
         row--;
      }
   }
}
We need means to "map" from Row/Column into the grid data array index. For that we add a public function (in the AGameModeIngame class):
UFUNCTION(BlueprintPure)
int32 GetCellIndex(int32 Column, int32 Row) const;
To implement that, we use a somewhat simple math. In order to explain, let's see an image representing the first two rows of grid, from the internal data "point of view", that is setup to have 9 columns (the value of mColumnCount):

If we take a variable, ArrayIndex, to iterate through the data grid and set it to 0 then we will access the bottom left cell of the grid. Let's jump to the last column of the first row, by setting ArrayIndex to 8. Incrementing this value will then be the equivalent of "going back" to the first column while stepping to the "next row". Now notice this, the first column in the second row has index 9, which is mColumnCount. While not drawn, if we wanted to jump into the third row, first column, our index would be 18, or mColumnCount * 2. Then, to reach the desired column all we have to do is add to the result of this multiplication. Before showing a general form, remember that we are dealing with zero-based-indexing, meaning that first row has index = 0 and the same is true to the column. With that said, if we call I the desired index, it could be computed like this:
See? Simple, right? We will directly use this formula in our GetCellIndex() function, although there will be a few sanity checks that if failed, will make the function return -1.
int32 AGameModeInGame::GetCellIndex(int32 Column, int32 Row) const
{
   if (Column < 0 || Column >= GetColumnCount())
      return -1;
   if (Row < 0 || Row >= GetRowCount())
      return -1;

   return ((GetColumnCount() * Row) + Column);
}
The last aspect of this block management code is a function used to add (set) the block actor pointer into the data array. The reason to add this function instead of directly performing this setup from the block spawning code comes from the fact that the blocks used in player pieces are meant to be added into the data array only when they have "landed", not when "falling". With that in mind, we add a public function:
void AddBlockToGridData(int32 CellIndex, class ABlock* Block);
Its implementation doesn't require much. All we have to do is check if CellIndex is valid and, if so, access the object to set the actor pointer, like this:
void AGameModeInGame::AddBlockToGridData(int32 CellIndex, class ABlock* Block)
{
   if (CellIndex < mGridData.Num())
   {
      mGridData[CellIndex].BlockActor = Block;
   }
}
Cell Location and Scaling
We still need some last changes before we can actually deal with the block spawning code. Early in this part I have said that we will need to specify the location where the blocks have to be spawned at. We know this information can be obtained from the Tile Map held by the PlayField class. For that, we have to hold a pointer to the PlayField actor meaning that we have to obtain this pointer. In the text above, there is already a hint on how we will obtain this pointer, which is through the usage of Actor Iterators. Because they only provide something when the game is running, we can then make use of this at the OnConstruction() function of the GameMode class. Since our project is not meant to have multiple APlayField objects in the same scene, we can just take the first one in the iterator list and be done with it!
Ok, so let's begin by adding the property pointer. In the private section of the class add:
UPROPERTY()
class APlayField* mPlayField;
This is a pointer and we better initialize it with nullptr. At the constructor of the class, append:
AGameModeInGame::AGameModeInGame()
{
   ... // previous code

   mPlayField = nullptr;
}
Finally, in the definition of BeginPlay() append:
void AGameModeInGame::OnConstruction(const FTransform& Transform)
{
   ... // previous code

   // Obtain the PlayField pointer
   TActorIterator<APlayField> it(GetWorld());
   mPlayField = it ? *it : nullptr;
}
Ok, with a pointer to the PlayField, we need means to query the desired location! The Paper Tile Map class offers a function named GetTileCenterPosition(), which requires the column, row, layer and a flag specifying if the return value should be in local or world space. Column and Row should be pretty self explanatory. When we created the grid/PlayField (part 4), we have seen that Tile Maps require at least one layer in order to work and indeed we have one, its index being 0. So, for this argument all we have to do is pass in 0. And then, we do want the return value to be in world space, since the spawned block will not be attached to the PlayField.
With all that said, we want a function (GetCellLocation()) added to the PlayField class meant to return the World Space location of the center of the specified cell. In the public section of the PlayField class:
FVector GetCellLocation(int32 Column, int32 Row) const;
As to its definition, we just make use of the GetTileCenterPosition() function:
FVector APlayField::GetCellLocation(int32 Column, int32 Row) const
{
   if (!mTileMap)
      return FVector();

   return mTileMap->GetTileCenterPosition(Column, Row, 0, true);
}
Remember that our block management is using row indexing in reverse order when compared to the tile map. Let's create two shortcut functions inside the AGameModeInGame class, one public and the other private. Those functions are meant to directly perform the correct "mapping" from our internal data indexing into the tile map indexing. So, the private function:
FVector GetCellLocation(int32 CellIndex) const;
And the public function:
// Using internal indexing (bottom-up), obtain the cell location from the tile map
UFUNCTION(BlueprintPure)
FVector GetCellLocation(int32 Column, int32 Row) const { return GetCellLocation(GetCellIndex(Column, Row)); }
The implementation of the private shortcut function:
FVector AGameModeInGame::GetCellLocation(int32 CellIndex) const
{
   return mPlayField->GetCellLocation(mGridData[CellIndex].TileMapColumn, mGridData[CellIndex].TileMapRow);
}
One last addition is access to the map scale, stored in the PlayField class. This value is necessary so we can correctly scale the spawned blocks in a way they will fit in the grid. Luckily this addition is very simple. Just add, in the public section of the APlayField class, the following line:
float GetMapScale() const { return mMapScale; }
The Spawn
Block management, (pseudo-)random block picker, block positioning and block scaling... we can finally use that to spawn blocks! In order to do that, we create a function that receives some arguments, Column, Row, TypeID and AddToGrid flag. The first two arguments are used mostly to gather the position where the blocks should be spawned at. TypeID is an index pointing to the relevant entry in the block collection array. Finally, AddToGrid is a flag that, if true, will "tell" the function to automatically add the spawned block into the management array. Wait, we have just created a lot of code meant to manage spawned blocks and then at the spawning moment we have a flag to not use that? The reason for that is because when we come to spawn the blocks forming the player piece, we don't want those to be immediately added into the grid.
The grid cell location is almost where the block should be spawned at. If we directly use this value there is the possibility of running into rendering conflicts between the block and the grid itself. In order to avoid that we have to slightly move the block "to the front" or, in other words, towards the camera. Considering all of the previous setup, all that must be done is add a positive number to the Y coordinate. This number can be anything as long as the result does not get bigger than the camera's Y value. Just for simplicity, we will add 1.
In Unreal Engine, the usual way to spawn new actors is through the UWorld::SpawnActor() function, however if there are some setup values that affect the rendering there is the possibility of some visual glitches happening during the spawn. Although for our case this will unlikely be the case, we will use UWorld::SpawnActorDeferred() function, which returns a valid pointer but not fully spawned actor. This pointer can be used to perform the necessary initialization and when done, we call in UGameplayStatics::FinishSpawningActor() in order to finalize the actor spawning.
Enough talking (errr, writing), right? Let's implement this. Start by declaring the new function in the public section of the AGameModeInGame class:
UFUNCTION(BlueprintCallable)
class ABlock* SpawnBlock(int32 Column, int32 Row, int32 TypeID, bool AddToGrid);
Its implementation is rather busy. First we have to get the game theme data then check if the requested TypeID is valid within the block collection. Next, we need the data index, which is mapped from the column and row. In order to spawn the actor we need the UWorld object pointer and, obviously, the PlayField, both valid. Once the conditions are met, we need to obtain the block data from the collection, then the location corresponding to the column/row and build a transform (no rotation and translation according to the location) that is required by the spawning function. After all that, we begin the spawning process, with the SpawnActorDeferred function. Provided we got a valid object we can perform the necessary initialization, through the Init*() functions we have added into the ABlock class. We also ensure the correct sprite and scale are set. Once all of that are done, we finalize the spawning with FinishSpawningActor(). The code looks like this:
ABlock* AGameModeInGame::SpawnBlock(int32 Column, int32 Row, int32 TypeID, bool AddToGrid)
{
   UThemeData* theme = UColBPLibrary::GetGameTheme(this);

   if (TypeID >= theme->BlockCollection.Num())
   {
      return nullptr;
   }

   const int32 data_index = GetCellIndex(Column, Row);
   if (data_index == -1)
   {
      UE_LOG(LogTemp, Warning, TEXT("Requested column/row (%d/%d) resulted in an invalid cell index (%d)"), Column, Row, data_index);
      return nullptr;
   }

   ABlock* retval = nullptr;
   UWorld* const world = GetWorld();

   if (world && mPlayField)
   {
      // A shortcut to the block data
      const FBlockData& block_data = theme->BlockCollection[TypeID];

      // Obtain the spawn location, already shifted towards the camera
      const FVector location = GetCellLocation(data_index) + FVector(0, 1, 0);

      // The transform, necessary to spawn the actor
      FTransform spawn_transform(FRotator(0, 0, 0), location);

      // Start the spawn process
      ABlock* block = world->SpawnActorDeferred<ABlock>(block_data.BlockClass, spawn_transform);

      if (block)
      {
         // Initialize the block
         block->InitTypeID(TypeID);
         block->InitMaterial(block_data.Material);

         block->GetRenderComponent()->SetSprite(theme->BlockSprite);
         block->GetRenderComponent()->SetRelativeScale3D(FVector(mPlayField->GetMapScale()));

         // Finalize actor spawning (construct)
         UGameplayStatics::FinishSpawningActor(block, spawn_transform);

         retval = block;

         if (AddToGrid)
         {
            AddBlockToGridData(data_index, block);
         }
      }
   }
   return retval;
}
Blueprint GameMode
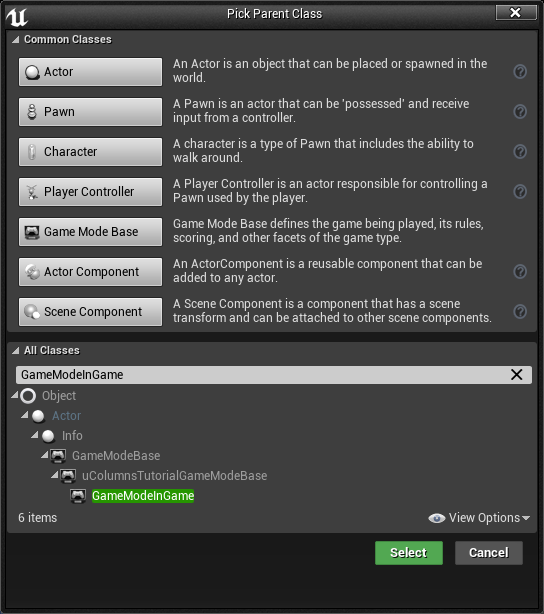
As already said in this part, unfortunately we can't directly change game mode properties unless the game mode is a Blueprint class. Because of that, we create a Blueprint class asset named BP_GMTraditional which should have GameModeInGame as its parent:
Now, in the InGameTraditional level, change again the GameMode override, so it now uses BP_GMTraditional. Editing this asset and updating column and row grid count should update the grid that is placed in the level. I encourage you to experiment with that!
Testing Spawns
We again reach an optional part of the tutorial. In here we will add some temporary code into our new Blueprint game mode class so we can test our block spawn code and the random picker. So, open (edit) the BP_GMTraditional asset and if needed, click the Open Full Blueprint Edit link above the properties. Note that this is only necessary if the opened window only contains the Class Defaults tab, allowing you to edit some properties.
All that we will do now is add a loop meant to spawn a block in each column of the first row of our grid. This loop should be executed in the BeginPlay:

Yes, it's that simple! Compile, save and hit the Play button. And the result should look similar to this:

Of course, it's unlikely you will get the blocks in the same order, since they are being randomly picked. Now, experiment changing the number of columns property (you have to click the Class Defaults button in the toolbar) and see that we are still spawning blocks in all columns! When you are done testing/experimenting, delete the nodes that come after BeginPlay because we won't need them.
We have covered a lot of the foundation code in this part and finally began to see something that changes between game executions. The main visual elements of our game, the blocks, are now being correctly spawned, and that means position and scaling. Even if you didn't follow the optional testing, the screenshot showcases the fact that we are indeed getting the desired results from block spawning and the random block picker!
In the next part we will deal with some code improvements and then implement the core system that will manage our game rules, a simple finite state machine.