Part 2 - Instance, Controllers, Modes and MapsApril 11, 2019
In this part we will create the initial C++ code for the Game Instance and Player Controllers. Then we create Game Modes as well as the maps (game levels) that will be part of the game.
If you don't know how to add new C++ classes to your project, please read Adding C++ Class to UE4 Project.
Game Instance
When the game is initialized it creates an object of UGameInstance, which we can specify through the editor. This object will be valid during the entire time the game is running, even throughout different levels/maps. This characteristic makes this class perfect to hold values that you will want to be valid across the game, like game settings and high scores for example. And that's exact what we will use this class for. There is another functionality that we will add into this class which is the ability to respond to the game window being resized.
Quoting from the API documentation:
GameInstance: high-level manager object for an instance of the running game. Spawned at game creation and not destroyed until game instance is shut down. Running as a standalone game, there will be one of these. Running in PIE (play-in-editor) will generate one of these per PIE instance.
So now we add our own custom game instance class, UColGameInstance, derived from UGameInstance. Its initial code follows (remember, this is boilerplate code):
#pragma once

#include "Engine/GameInstance.h"
#include "ColGameInstance.generated.h"

UCLASS()
class UCOLUMNSTUTORIAL_API UColGameInstance : public UGameInstance
{
   GENERATED_BODY()
public:
   UColGameInstance();

private:
};
Please pay attention to UCOLUMNSTUTORIAL_API as it will be different if your project was not named uColumnsTutorial like in my case. If you are unsure of what this should be, check the file {project_name}GameModeBase.h that was generated by the editor when the project was created. This file declares the base game mode class of the project and in there you will find the proper macro entry.
As mentioned before, we intend to respond to the event that is fired up when the game window is resized. In order to do that, when the object is initialized we have to register a member function (method if you prefer this name) within the ViewportResizeEvent delegate system. As a good practice we will want to cleanup when the game instance object is shutdown, which means unregister the event listener from the delegate system. So, how to do all this? The first thing is that we need to add code both to the initialization and to the shutdown process of the game engine object. Conveniently the base class do provide the necessary interface methods exactly to achieve that. We have to override those two member functions (in the public section of the class - the new one we just added to the project):
void Init() override;

void Shutdown() override;
As already said, during the initialization we have to register a member function that will be called by the engine whenever the game window is resized. While the name of this function can be anything that you want, its signature must be void function_name(FViewport*, uint32). This function can be declared in the private section of the class, so add in the OnViewportResize declaration:
// Will be used to register within the ViewportResizeEvent delegate. In other words,
// this function will be called whenever the game window is resized
virtual void OnViewportResize(class FViewport* Viewport, uint32 ID);
The "register" function that we will call returns a delegate handle that will be needed in order to "unregister" the OnViewportResizd function. For that we declare in the private section a member variable:
// Holds information necessary to un-register the OnViewportResize function from the ViewportResizedEvent delegate.
FDelegateHandle mViewportHandle;
The OnViewportResize() function will be called whenever the game window is resized, and chances are high that we will want to relay this event so other classes will be able to respond as necessary. One relatively simple approach here is to use a virtual function and/or a blueprint implementable event function. In this case the problem is that we don't know beforehand every single class that will need to do something when the window is resized.
Instead we can use our own dynamic multicast delegate to broadcast whenever the window is resized. With that, any object that needs to respond to this event can add a listener to our multicast. One may ask why not provide means to directly bind into the ViewportResizedEvent delegate?. Well, the reason is because this function requires the use of uint32 type, which is not exposed to blueprints.
We will actually declare two delegates. One that is a simple dynamic delegate that will serve as interface, a function argument that will gather the event object and will be added into an internal dynamic multi cast delegate.
DECLARE_DYNAMIC_DELEGATE(FOnWindowResizedDelegate);
DECLARE_DYNAMIC_MULTICAST_DELEGATE(FOnWindowResizedMultiDelegate);
Because the multi cast delegate is meant for internal usage, we hide it in the private section of the game instance class:
// Used to relay the resized event to any listener
UPROPERTY()
FOnWindowResizedMultiDelegate mOnWindowResizedEvent;
We now need some way to add (bind) functions into that multi cast delegate. We will do that through the use of a public function that receives one FOnWindowResizedDelegate and also can be called from blueprints:
// Adds an event listener that will be called whenever the game window is resized
UFUNCTION(BlueprintCallable, Category = "Event Binding")
void ListenWindowResized(FOnWindowResizedDelegate WindowResizedDelegate) { mOnWindowResizedEvent.Add(WindowResizedDelegate); }
We can now use this function both from native C++ code and blueprints to add new functions into the dynamic delegate in order to listen to the event. This means that anywhere we need functionality impacted by the window resize event we will be able to retrieve the game instance object and call ListenWindowResized!
Before going to the definitions of the other functions, let me show you how the entire declaration of the game instance class should look like. Please note that I will not do this (show the entire code) again for the rest of the tutorial.
#pragma once

#include "Engine/GameInstance.h"
#include "ColGameInstance.generated.h"

DECLARE_DYNAMIC_DELEGATE(FOnWindowResizedDelegate);
DECLARE_DYNAMIC_MULTICAST_DELEGATE(FOnWindowResizedMultiDelegate);

UCLASS()
class UCOLUMNSTUTORIAL_API UColGameInstance : public UGameInstance
{
   GENERATED_BODY()
public:
   UColGameInstance();

   void Init() override;

   void Shutdown() override;

   // Adds an event listener that will be called whenever the game window is resized
   UFUNCTION(BlueprintCallable, Category = "Event Binding")
   void ListenWindowResized(FOnWindowResizedDelegate WindowResizedDelegate) { mOnWindowResizedEvent.Add(WindowResizedDelegate); }

private:
   // Will be used to register within the ViewportResizedEvent delegate. In other words,
   // this function will be called whenever the game window is resized
   virtual void OnViewportResize(class FViewport* Viewport, uint32 ID);


   // Used to relay the resized event to any listener
   UPROPERTY()
   FOnWindowResizedMultiDelegate mOnWindowResizedEvent;

   // Holds information necessary to un-register the OnViewportResize function from the ViewportResizeEvent delegate.
   FDelegateHandle mViewportHandle;

};
The definition of this class will require a few includes:
#include "ColGameInstance.h"
#include "Runtime/Engine/Classes/Engine/GameViewportClient.h"
#include "Classes/Engine/World.h"
#include "ConstructorHelpers.h"
At least for now we don't need anything within the body of the constructor, however we have to define it anyway in order to avoid linking errors. So, there goes it:
UColGameInstance::UColGameInstance()
{}
In the initialization we want to "register" our OnViewportResize() function to be called whenever the game window is resized. For that, the viewport object contains an static multicast delegate called ViewportResizedEvent which we can access and add in our function. Bellow is the full definition of the function. Please notice the Super::Init() within the function's body. We are overriding the Init() function and if the the base class has any default initialization, there is some probability that we will want that code to run too. In this case we do, so we call the super class' definition.
void UColGameInstance::Init()
{
   Super::Init();

   // Register the on viewport resize event to our function and store the delegate handle
   mViewportHandle = FViewport::ViewportResizedEvent.AddUObject(this, &UColGameInstance::OnViewportResize);
}
We now define the shutdown function. In there we access the exact same multicast delegate and request to remove a delegate, through the handle we have stored (mViewportHandle) during the initialization.
void UColGameInstance::Shutdown()
{
   // Unregister the viewport resize event.
   FViewport::ViewportResizedEvent.Remove(mViewportHandle);

   Super::Shutdown();
}
Now it's time to define the function that will actually be called through the multicast delegate. In there we obtain the viewport size and then broadcast using our own multi cast delegate:
void UColGameInstance::OnViewportResize(FViewport* Viewport, uint32 ID)
{
   // Broadcast to any bound function
   mOnWindowResizedEvent.Broadcast();
}
For now that's all for the game instance, C++ code. At a later moment in the tutorial we will add more to it. Near the end of this part we will create the Blueprint class and setup the project to use it.
Before we move on, there is one important thing to mention regarding the OnViewportResize() function. Notice that I declared it as a virtual function. The reason is that if there is any need to create a C++ class derived from UColGameInstance, we have to opportunity to override this function and "bypass" the Blueprint calling. While we will not do that in this project, I purposely declared the function in this way just to make it clear about this kind of design.
Controllers
After reading the documentation entry for Controllers, it's clear that there are two major groups: Player Controllers and AI Controllers. Our project does not require any kind of Artificial Intelligence so we will not deal with AI Controllers. Another thing is that we can think about Controllers as means to handle input and modify the behavior of the game actors. In our case, the interaction with the Player Piece. You know that thing composed by at least 3 random blocks, formed in a column like shape, right? In our project we will create a base C++ class and then inside the engine derive from it using Blueprint to create specialized controllers. Soon you will see exactly what I mean.
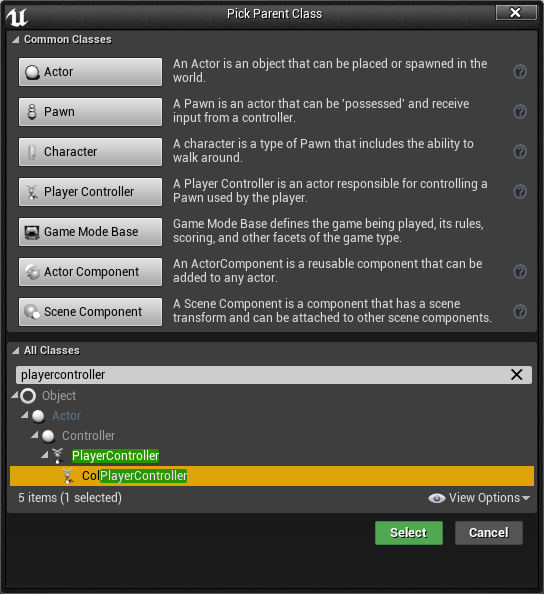
So, let's create our new C++ class, AColPlayerController which is derived from APlayerController. Its boilerplate code:
#pragma once

#include "CoreMinimal.h"
#include "GameFramework/PlayerController.h"
#include "ColPlayerController.generated.h"

UCLASS()
class UCOLUMNSTUTORIAL_API AColPlayerController : public APlayerController
{
	GENERATED_BODY()
public:
   AColPlayerController(const FObjectInitializer& ObjectInitializer);
};
The definition code:
#include "ColPlayerController.h"

AColPlayerController::AColPlayerController(const FObjectInitializer& ObjectInitializer)
{

}
Later in the tutorial we will add code to this class. For now, just leave like this. Yes, for now it's doing nothing but providing the base class that will be used inside the editor. Build the project and we are ready to open it inside Unreal Engine editor again.
Inside the editor, we create two blueprint classes derived from ColPlayerController, one that will be used in the main menu and the other in game. So, in your Blueprints directory, create two classes, BP_PCMainMenu and BP_PCInGameDefault.
At a later moment we will work on those classes.
Game Modes
Instead of me trying to explain what the game mode is meant to do and how it works, the documentation is a really nice source. The important thing to note is that the game mode holds information related to the rules of the game. Furthermore, we can associate several framework classes with each game mode, like Game Session, Game State, Player Controller, Player State, HUD and so on. For this project, we will take advantage of this association to use the relevant player controllers within our game modes.
While we can set a project wide default game mode, we also can override this setting for each map. Now, attention to this detail. We create a map, associate a game mode with it (through the override functionality) and, in turn, we have the desired player controller indirectly associated with the map! In bigger projects we would, of course, use the other classes but for us in this tutorial, only the player controller association will be used.
When the project was created, part of the default initial code added by Unreal Engine includes a base Game Mode C++ class. Because I named my project uColumnsTutorial, I now have the AuColumnsTutorialGameModeBase declared and defined in uColumnsTutorialGamModeBase.h and uColumnsTutorialGameModeBase.cpp, respectively. Instead of creating yet another base class, we will use this one as base for all of our game modes.
There is also another detail related to the game mode. One of its class properties is named Default Pawn Class. This is the pawn class that will be spawned once the level begins and its default value adds a pawn that is just an sphere. Because this property is often ignored when not needed, some confusion is very common since an stray sphere will be added into the scene when play testing. We obviously don't want that sphere! To solve that we have to set that property to none which, in code, is the same as setting it to nullptr. We will do so from the constructor, which must be declared:
UCLASS()
class UCOLUMNSTUTORIAL_API AuColumnsTutorialGameModeBase : public AGameModeBase
{
	GENERATED_BODY()
public:
   AuColumnsTutorialGameModeBase();
};
Then, the definition is a matter of assigning the null pointer to the property:
AuColumnsTutorialGameModeBase::AuColumnsTutorialGameModeBase()
{
   DefaultPawnClass = nullptr;
}
Next, we will create two classes derived from AuColumnsTutorialGameModeBase. One will serve as the base for all in game game modes and the other will be used for the main menu. Because our needs for the main menu are relatively simple, we will implement the main menu game mode entirely with blueprints while the base in game will be from C++.
That said, let's begin with the C++ class, AGameModeInGame:
#pragma once

#include "uColumnsTutorialGameModeBase.h"
#include "GameModeInGame.generated.h"

UCLASS()
class UCOLUMNSTUTORIAL_API AGameModeInGame : public AuColumnsTutorialGameModeBase
{
   GENERATED_BODY()
public:
   AGameModeInGame();

private:
};
Now, we define the class (the constructor). All that we do is make sure ticking is enabled. Since this is will be, in a way, the core of the game, we will definitely need it so, hopefully there isn't need to explain anything else here.
#include "GameModeInGame.h"

AGameModeInGame::AGameModeInGame()
{
   PrimaryActorTick.bCanEverTick = true;
}
Build the project. In the editor we can now create the "Main Menu" game mode Blueprint class. So, add a Blueprint asset named BP_GMMainMenu and select uColumnsTutorialGameModeBase as its parent.
As mentioned, we intend to associate the appropriate game controller to each Game Mode. This is a matter of assigning the correct value to the property named Player Controller Class. Because BP_GMMainMenu is a Blueprint class, it's relatively simple. Edit (by double clicking) this Blueprint asset and if Class Defaults is not opened, locate the button with this name in the toolbar and click it, which should allow you to edit the properties. Then assign the property Player Controller Class = BP_PCMainMenu.

Now, how about our C++ "in game" game mode class? If we take a look into the Game Mode class' base, we can locate the relevant property declared as TSubclassOf<APlayerController> PlayerControllerClass;. The usual code would be to assign to this value as something like PlayerControllerClass = SomePlayerController::StaticClass();. However, our player controller class created for usage "in game" is a Blueprint class, not C++. What we have to do is use the Constructor Helpers to locate our Blueprint Class. I will show how to do that in a moment but before I have to talk about one shortcoming of this: IF we decide to rename the player controller Blueprint class, we will have to update the C++ code and then rebuild the project. This happens because we have to locate the Blueprint class by a path, which includes the name of the asset. The "generic" code to perform such operation is like this:
static ConstructorHelpers::FClassFinder<SomeClass> helper_name(TEXT("/Path/To/Asset/AssetName.AssetName_C"));
PropertyToBeSet = helper_name.Class;
In order to know the exact path to your asset, just hover the mouse over it and in the tooltip window, the very information should be "Path". Since I have added the player controller blueprints under the Blueprints directory (which is under Content directory), the resulting path in my case becomes /Game/Blueprints/. And since I have named the "In Game" player controller class BP_PCInGameDefault, the full path to this asset becomes /Game/Blueprints/BP_PCInGameDefault.BP_PCInGameDefault_C.

So, let's edit GameModeInGame.cpp file and update the include list:
#include "GameModeInGame.h"
#include "ConstructorHelpers.h"
#include "ColPlayerController.h"
We now update the constructor to look like this:
AGameModeInGame::AGameModeInGame()
{
   PrimaryActorTick.bCanEverTick = true;

   static ConstructorHelpers::FClassFinder<AColPlayerController> bp_pc(TEXT("/Game/Blueprints/BP_PCInGameDefault.BP_PCInGameDefault_C"));
   PlayerControllerClass = bp_pc.Class;
}
Again, if you ever rename the player controller class, this code will have to be updated and the C++ project rebuilt. In any case, build the project and now we have a game mode class named GameModeInGame with BP_PCInGameDefault as the default game controller class. If at a later moment we create any Blueprint class derived from GameModeInGame, by default it will use this player controller.
The Maps
Any Unreal Engine project will require at least one map (level). In our case we will begin with two, one for the main menu and the other for the gameplay. So go ahead and under your maps directory, create two level assets, one named MainMenu and the other InGameTraditional.
Open the Main Menu map (by double clicking it). Yes, the level is empty and entirely black. Don't worry, later we will fill in. What we have to do is to edit the level settings to use the correct game mode. To do so, locate the Settings button and then click World Settings.

Now it's possible to edit the GameMode Override property. By default it is set to None. Change it to BP_GMMainMenu and then save the map. Now, let's move to the InGameDefault map. The World Settings should already be displayed. Change the GameMode Override property to GameModeInGame.
Now we have associated with each map our game modes which, in turn, have been associated with the Player Controllers meant to "operate" under each of the maps.
A very detailed, step-by-step, instructions text on how to setup game modes and override them in specific maps can be found here.
Game Instance Blueprint
Let's create a Blueprint class derived from our Game Instance (created early in this part). This will allow us to tweak values during the development of the game. In your Blueprint directory, create a new Blueprint Class, selecting ColGameInstance as its parent. I have named this class BP_GameInstance. The last thing to do is to setup the project to actually use this new class, which must be done from the Project Settings
Locate Project/Maps & Modes main category. In there we only need to edit the Default Maps and the Game Instance Class properties. Change the properties according:
Editor Startup Map = InGameTraditional: The selected map will be the first one loaded whenever the Unreal project is opened.Game Default Map = MainMenu: Tells which map will be loaded in a packaged game or stand alone test.Game Instance Class = BP_GameInstance: Specify the class that will be used to create the game instance object.
Although we did add a few things to the project, there isn't anything to see yet. In the next part we will deal with the camera as it will define how everything will be displayed on screen.
External links and extra reading
Delegates: Documentation over delegates
Multicast Delegate: Documentation related to multicast delegates
Functions Reference: Provides reference for the UFUNCTION C++ modifier
Controllers Documentation: Controllers overview documentation
Game Mode Documentation: Information regarding game modes
Game Mode Setup: How to override the game mode within the project